How I Take Notes
A while ago I read a great piece by Gilles Castel on how to take notes using $\LaTeX$ and Vim. The resulting notes are stunning. Everything from mathematical formulae to figures are created real-time by Castel. I knew I wanted to do something similar with my lecture notes.
I, however, wanted to change two things:
- $\LaTeX$ can be intimidating and ugly to work with real-time
- I didn’t like the idea of having my notes in a PDF; I wanted to have them on a website so it can be interactive and so I can have a permanent link to them even if I make revisions.
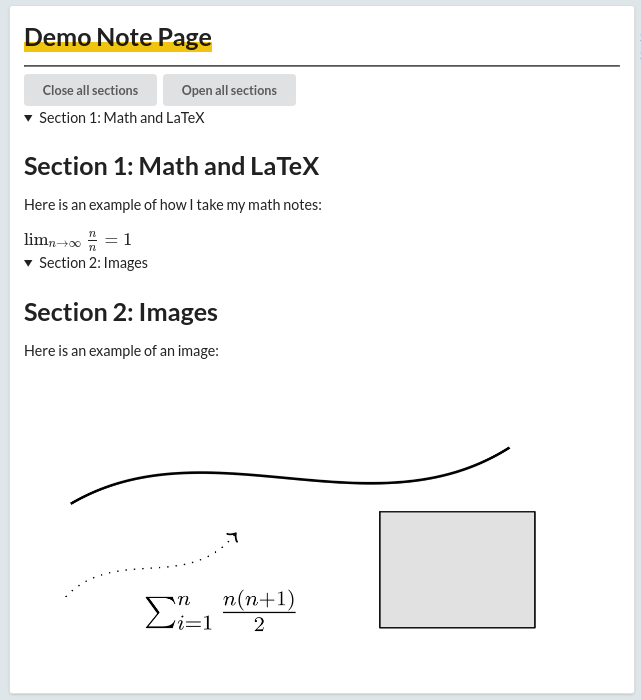
My result? Well, check out the notes page page here on my website. Particularly, check out my Calculus 1 notes and my Computer Science 2 notes.
During lecture, I write my notes in markdown using the editor Vim (but it would work with any other plaintext editor). For those unfamiliar with Markdown, it’s a language for creating formatted text using a plain text editor. Check out this short clip of what it looks like when I’m writing my notes and drawing my figures:
The result of this can be seen below or here.
What’s Going On
It starts with me writing notes in Markdown. From there, kramdown, and JavaScript turn it into something that looks nice on a webpage. The whole process is shown by the following animation:
To recap:
- Text is typed in Markdown
- Kramdown turns it into HTML
- HTML is split up and put into
detailtags with thesummaryas theh1header.
For a more in-depth explanation, read the technical details below. If you want help setting up a similar system for yourself, I’d love to help you out:
Technical Details
With all that said, how did I do this and how does this work? There are three main components to what goes on while I take notes: Jekyll, Inkscape, and Vim.
Jekyll: Getting it on the Web
Jekyll is a static site generator which allows me to host these notes online. I use Jekyll for two reasons: it works with kramdown (more on that later) and it’s free. The reason that it can be free is because it doesn’t actually run your website on a server. It just creates unchanging (hence the word static) files that are accessed when someone visits your site. These static files are hosted by Github in my website’s repository. For more on this, look up Github Pages.
Kramdown: Compiling to HTML
Kramdown is an all-purpose Markdown converter. So this:
### Example Markdown
Here are some notes. **This text is important**.
The *quick* brown fox jumps over the *lazy* dog.

> This is a block quote
Turns into this (with the help of kramdown):
Example Markdown
Here are some notes. This text is important. The quick brown fox jumps over the lazy dog.
This is a block quote
I use kramdown to convert what I write during lecture (markdown as shown above) to something that can be displayed on a webpage (HTML). You can also put HTML directly into Markdown. I like to view notetaking with the philosophy that the method that requires the least energy persists. As such, I wanted to reduce the friction of writing good notes. Markdown is the best option for this. It’s the easiest – and quickest – to type during lecture. Unlike a what-you-see-is-what-you-get editor (such as Google Docs or Microsoft Word), using the plain text editor Vim (more on that later) speeds up the process by not having to use your mouse. Also, because this is displayed as HTML (on a webpage), you are free to add your own CSS styling to it.
JavaScript: Adding Features
However, you can’t do everything with just plain Markdown. But because it renders into HTML, you can manipulate the HTML any way you want with JavaScript.
For example, mathematical formulae. I wanted to be able to use this method of note taking with math as well therefore reducing the limitations that digital note taking has. For this, I use KaTeX, a JavaScript library that can render $\LaTeX$ into HTML. This way, I get the benefits of $\LaTeX$ without the complexness of using it for everything. Installing KaTeX on your website automatically converts plaintext to $\LaTeX$, for example $\lim_{n \to \infty} \frac{3n}{n} = 3$, to $\lim_{n \to \infty} \frac{3n}{n} = 3$.
Another thing that I add is automatic code syntax highlighting. For this, I use highlight.js.
KaTeX and highlight.js are the only two scripts that I use that I didn’t make myself. Even though I’ve only mentioned these two, anything written in JavaScript can be used.
Two other features that I wanted to add were collapsible sections and automatic table of contents. For this, I relied on regular expressions. Regular expressions are just an advanced way to search for text. So, for example, you can search for text between other text. This is called ‘positive lookahead’ and it means that in order for something to be a match, there needs to be another piece of text, however, that other piece of text itself isn’t matched. Consider the following example:
The fast dog likes the other dog
Now, what if we want to replace all instances of the word ‘dog’ with ‘cat’ but only if the word ‘fast’ is before it.
So we want:
The fast cat likes the other dog
The regular expression that we would use would be /(?<=fast )dog /gs. The (?<= XXX ) represents the positive lookahead. We can also visualize this:

Now, going back to the note taking, I consider a section to mean any HTML that is between two h1 tags (including the first). For this, we need to use a positive lookahead. In order for a section to end, one of two things must happen, either the end of the file or another h1 tag is open. But inside each section, there can be anything. The visualization below shows what we want:

So, we start with the opening of a h1 tag, then it can be anything, then we stop the matching right before the opening of another h1 tag or the end of the file. The regular expression for that is /<h1.*?(?=<h1|$)/gs. I then place each section into its own details tag.
The summary tag inside the details is also handled by a regular expression and it is just the text inside the first header (which is the h1). Another way to say this is the title of the section is the HTML between the start of one header tag and the end of the same tag. To do this, the regular expression is /(?<=<h[123][^>]*>).*?(?=<\/h[123])/gs and is represented by the following diagram:

Notice the positive lookaheads. We don’t want the header tags themselves in the matching, rather, we just want the text.
The code is as follows:
See Full Code
    // Onetime:
    //Create sections which are defined as area between two h1's
    const betweenH1 = /<h1.*?(?=<h1)/gs;
    var doc = document.getElementById('doc').innerHTML;
    var sectionsBody = doc.match(betweenH1);

    anyHeaderID = /(?<=<h[1-3][^>]*id=").*?(?=")/gs;
    anyHeaderText = /(?<=<h[123][^>]*>).*?(?=<\/h[123])/gs;
    var newHTML, curIDs, curHeaders;
    document.getElementById('doc').innerHTML = "";
    var contents = "<nav>In Open Sections:";
    for (var i = 0; i < sectionsBody.length ; i++) {
        //contents
        curHeaders = sectionsBody[i].match(anyHeaderText);
        curIDs = sectionsBody[i].match(anyHeaderID);
        contents += "<div data-id='" + curIDs[0] + "' hidden>";

        for (var j = 0; j < curHeaders.length ; j++){
            contents += "<a href='#" + curIDs[j] + "'>"
                + curHeaders[j] + "</a><br />";
        }
        contents += "</div>";

        // Body
        document.getElementById('doc').innerHTML +=
            "<details id='" + curIDs[0] + "'><summary>"
            + sectionsBody[i].match(anyHeaderText)[0]
            + + "</summary>" + sectionsBody[i] + "</details>";
    }
    document.getElementsByClassName("contents")[0].innerHTML = contents;
Inkscape: Drawing Figures
The biggest concern for those who are considering taking notes on the computer is the limitations. On paper, you can draw whatever you want wherever on the page. Traditional methods of digital note taking take away that freedom. Part of reason I admired Castel’s work is that he demonstrated that you can have your cake and eat it too – you can take digital notes without sacrificing freedom. That’s where Inkscape comes in. Inkscape is a free and open-sourced vector graphics editor. This is how I can draw figures real time. For information on the setup, read this article or schedule a meeting with me.
Although I won’t go into too much detail because the article linked above covers that, I will explain the high-level idea. For those who don’t know Inkscape, it is a vector graphics editor. The open-source alternative to Adobe Illustrator. However, by default, it would still be too slow to keep up during lecture. Instead, I take advantage of key-commands. Key-commands, or key combinations, can dramatically speed up the process because the most common things can be mapped to an instantaneous key press. So by intercepting the user’s keyboard inputs before they reach Inkscape, you can have full control over what goes on. Want to have a given rectangle have a fill color and have a solid outline? Click on the rectangle and type sf for ‘solid filled’. Castel goes into more depth on how to do this in the aforementioned article.
Vim: Writing the Notes
Excerpt from MIT’s Missing Semester lecture notes on Vim:
When programming, you spend most of your time reading/editing, not writing. For this reason, Vim is a modal editor: it has different modes for inserting text vs manipulating text. Vim is programmable (with Vimscript and also other languages like Python), and Vim’s interface itself is a programming language: keystrokes (with mnemonic names) are commands, and these commands are composable. Vim avoids the use of the mouse, because it’s too slow; Vim even avoids using the arrow keys because it requires too much movement.
The end result is an editor that can match the speed at which you think.
(Emphasis added)
Going back to the idea that the method that requires the least energy persists, Vim helps optimize and speed up the process of note taking therefore reducing the energy needed to continue taking notes.
Snippets: Speeds up Process
Snippets are a reusable piece of text that you can type via another piece of text. This way, you can dramatically speed up your writing process, specifically writing complex strings of text (such as the math $\LaTeX$ and commonly used text. For example, I write details tags a lot. So to speed up the process, I can just type ‘detail’ and hit the tab key.
I use UltiSnips to accomplish this:
snippet detail "Disclosure"
<details${3: open=""}>
  ${1:<summary>${2}</summary>}$0
</details>
endsnippet
Snippets are especially helpful with $\LaTeX$ math. I use similar methods to do this. For a more detailed explanation, I would recommend reading this.
To view my entire snippet file, click here.
Key Commands: Connects to Inkscape
The reason that I can draw figures mid-lecture is because of how quickly I can go from typing in Vim to drawing in Inkscape.
As mentioned before, I use Castell’s Inkscape setup. However, I wrote a python and bash wrapper for it.
First, I setup a key command in my vimrc that runs ink.py and sends it the document name (without the extension) and all of the text on the active line in Vim. The line in my vimrc is:
nnoremap <C-f> :exec '.!~/scripts/vim/ink.py %:r "'.getline(".").'"'
Now, the Python script’s job is to run the bash script and produces the output that inserts the HTML to display the just-created image. ink.py looks like the following:
#!/usr/bin/python3
import subprocess
import sys

if __name__ == "__main__":
    classname = sys.argv[1]
    filename = sys.argv[2]
    subprocess.run(["/home/emchap4/scripts/vim/ink.sh", classname, filename], capture_output=True)

    output = f"""<div style='width: 100%' class='ui rounded images'>
<img class='ui image' src='/notes/{classname}/{filename}.png'>
</div>
"""

    print(output)
Finally, the bash script ink.sh does:
- Creates a new svg file and opens it with inkscape (in a new window)
- Runs Castel’s Inkscape shortcut manager
- Waits until I’ve manually closed Inkscape (to signify that I’m done editing the image)
- Converts the svg to a png
- Closes Inkscape shortcut manager
- Returns to the previous window (where I was taking notes)
ink.sh:
#!/bin/bash

# $1 - the class name
# $2 - the image name

# Hold onto my previous workspace so I know where to return to afterwards
PREVWORKSPACE=$(i3-msg -t get_workspaces | jq -r '.[] | select(.focused==true).name' | cut -c1)
# Get where the image is going to be
IMAGEPATH=~/projects/website/eric-chapdelaine.github.io/notes/$1/$2

# Copy the template file into the correct directory
cp ~/.config/inkscape-figures/template.svg $IMAGEPATH.svg
# Goto another workspace (so that the text editor isn't on screen anymore)
i3-msg workspace number 11

# Run Castel's inkscape-shortcut-manager and save its process ID
python3 ~/.config/inkscape-shortcut-manager/inkscape-shortcut-manager/main.py & echo "$!" > /tmp/ink.pid

# Run inkscape
inkscape $IMAGEPATH.svg

# Wait until inkscape is closed
while pgrep -u $UID -x inkscape >/dev/null; do sleep 1; done

# Convert the created svg file to a png
inkscape --export-type="png" --export-dpi=1000 $IMAGEPATH.svg

# Kill inkscape-shortcut-manager
kill -9 $(cat /tmp/ink.pid) > /dev/null

# Return to previous workspace
i3-msg workspace number $PREVWORKSPACE

# Remove temporary file used to hold process ID
rm /tmp/ink.pid
Note, I am using Linux with the i3 window manager, but a similar system should work on any Linux system. For those on Mac or Windows, you most likely will not be able to get Inkscape shortcut manager to work, however, every other part of this process will work.